


Tutor Screen Sharing Guide
The following is intended to serve as a guide for sharing a desktop screen with a student, as well as enabling the student to share his or her screen.
1. Open QuickConnect and enter your scheduled session as normal.
If the user requests to share his or her screen OR if they request to see your screen, complete the following:
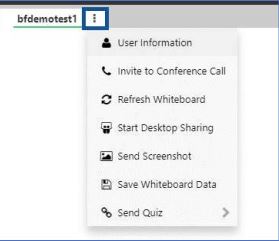
2. Right-click on the three dots to the right of the student’s name in QuickConnect and select “Start Desktop Sharing.”
a. If “Start Desktop Sharing” is not available, it means the feature is not authorized for the account yet!
b. If this is the case, you may tell the user that the feature is supported by Brainfuse, but not authorized for the account
yet. The user may contact [email protected] for additional information.
yet. The user may contact [email protected] for additional information.
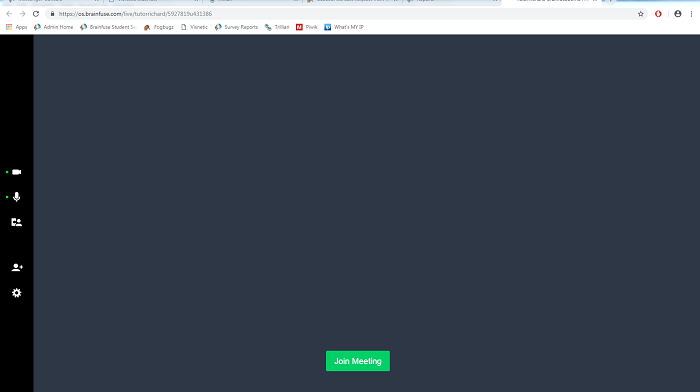
3. After selecting “Start Desktop Sharing”, a new window will open. The software being opened is called OnSync (ON).
4. From the new window, select the green “Join Meeting” button.
To share your screen, follow the steps below:
1. In the OnSync program, select the “Show Desktop Icon.”
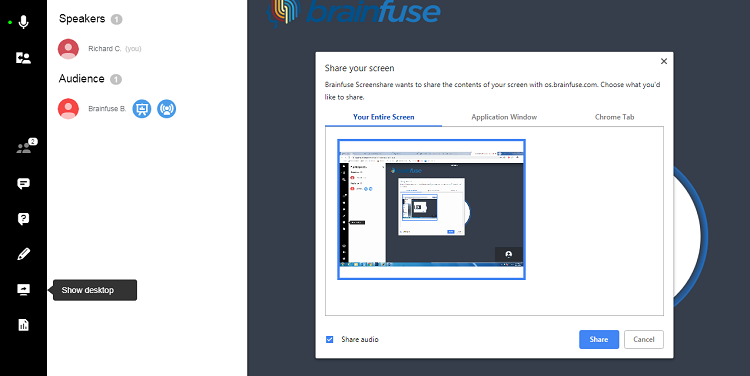
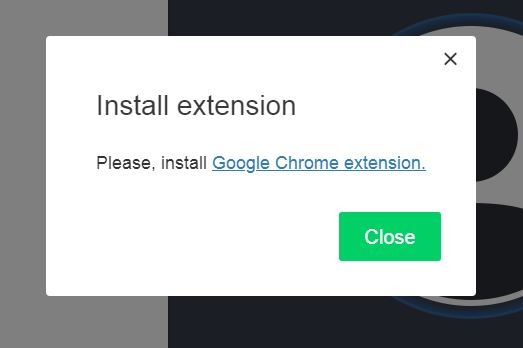
2. If this is the first time you are sharing your screen, you will receive a pop-up box prompting you to install the extension
necessary for screen sharing.
necessary for screen sharing.
3. Once the plugin is installed, select the appropriate option to share your desktop. You can select from the following options:
a. Your Entire Screen– share your Entire Desktop and all visible windows with the user.
b. Application Window – share only windows that pertain to a select program (e.g. Excel).
c. Chrome Tab - share only select tab in Google Chrome with a user.
d. Please Note: when sharing your Entire Desktop, ensure that there are no inappropriate programs/images in
the background.
the background.

4. You can stop sharing your screen by selecting the “Show Desktop” icon again.
To grant permission to allow a student to share his or her screen:
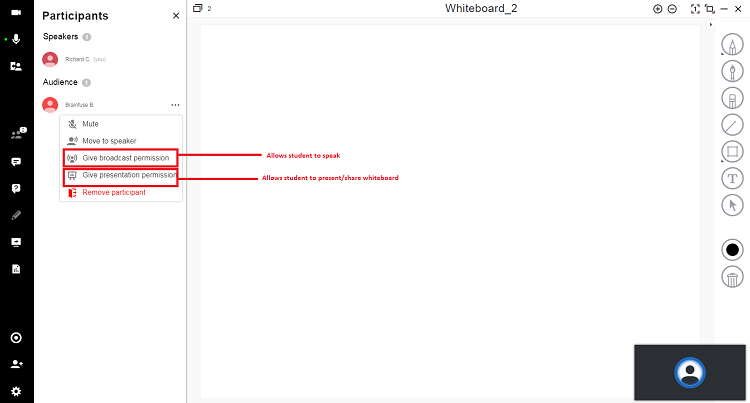
1. Select the “Participants” icon from the left menu.

2. Next to the user’s name, select the three dots to open an expanded menu.
3. From the menu, select “Give Presentation Permission”
4. Once you’ve granted “Presentation Permission,” the user may share his or her screen using the “Show Desktop” icon.

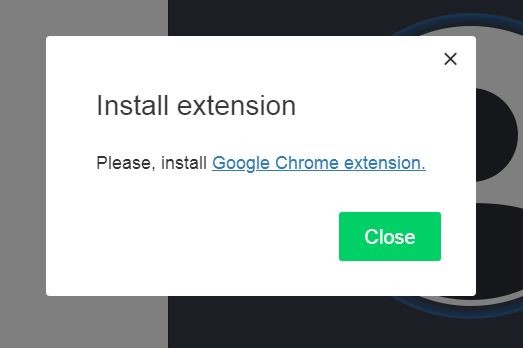
5. If this is the first time the user is sharing a screen, the same pop-up box prompting an install of the extension necessary for
screen sharing will appear. Guide the user to install the extension.
screen sharing will appear. Guide the user to install the extension.
6. If the user needs additional guidance, walk the student through the steps noted above.
For questions, please email [email protected]. Thank you.
Additional OnSync Features:
1. From the expanded participant menu, tutors are able to do the following:
a. Mute – disables a student’s microphone
b. Give Broadcast Permission – allow users the ability to share audio (i.e. speak with the tutor)
c. Give Presenter Permission – allow users to share desk
d. Remove Participant – removes the user from the meeting room

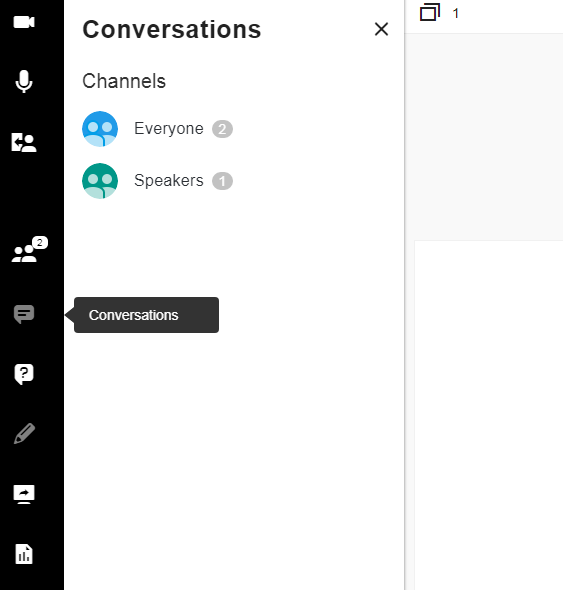
2. By selecting “Conversations” from the left menu and choosing “Everyone,” the tutor and user are able to chat within OnSync.
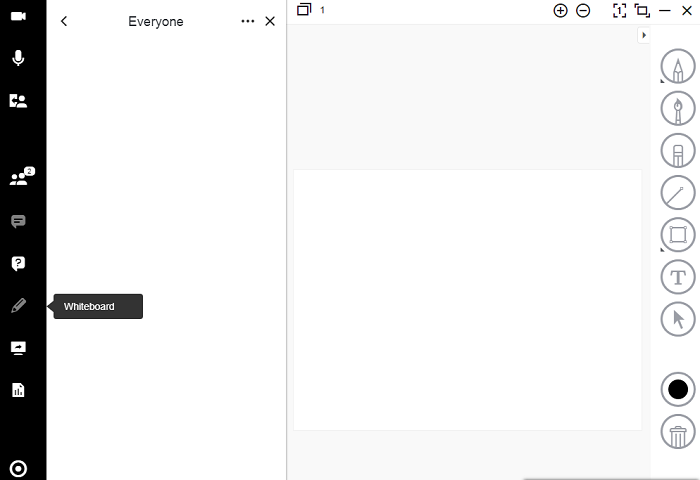
3. By selecting “Whiteboard” from the left menu, the tutor and user are able to communicate and work together on a shared
whiteboard within OnSync.
whiteboard within OnSync.
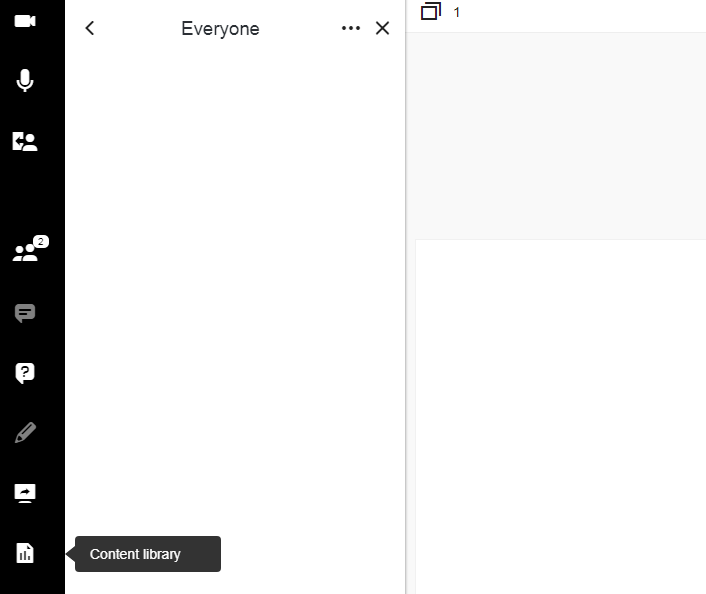
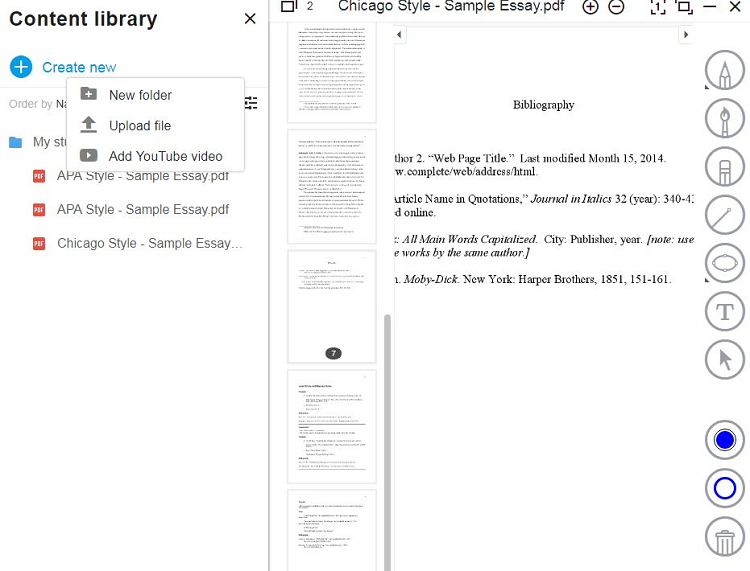
4. By selecting “Content Library” from the left menu, tutors and users are able to upload files and work together on the file.
For convenience, files may be organized in folders.
For convenience, files may be organized in folders.
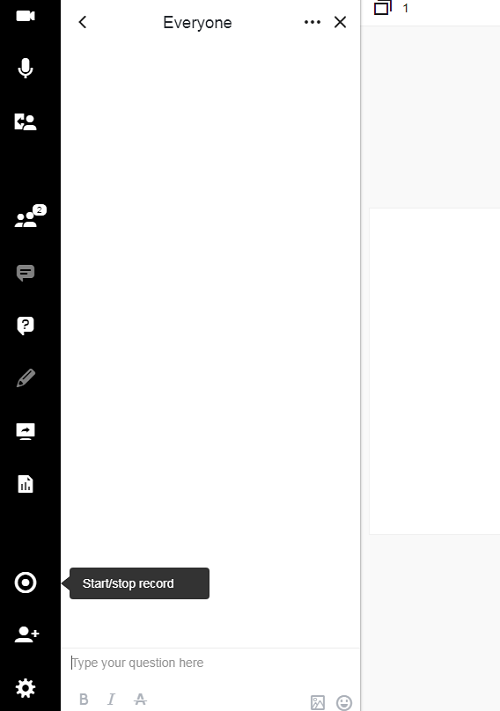
5. By selecting “Start/Stop Record,” the tutor is able to record the meeting for future use.
a. Note that OnSync sessions are automatically recorded in the session log.
For additional information about the audio and screen sharing features available in the Whiteboard, the following video may be helpful: