


A step-by-step description for admins that need to schedule a TutorMatch session.
1. Login into your admin account. If the student has no account, register the student before trying to schedule the TutorMatch session.
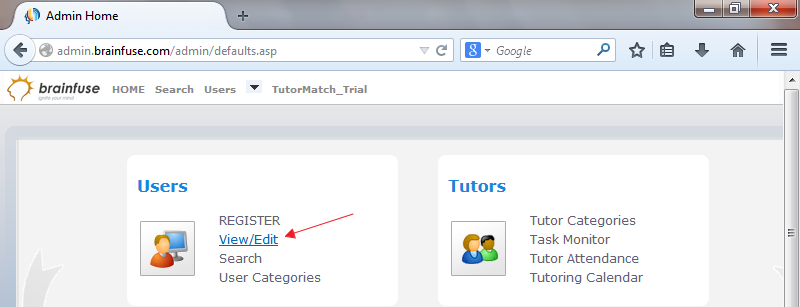
From your home page click on the "View/Edit" link under the "Users" menu.
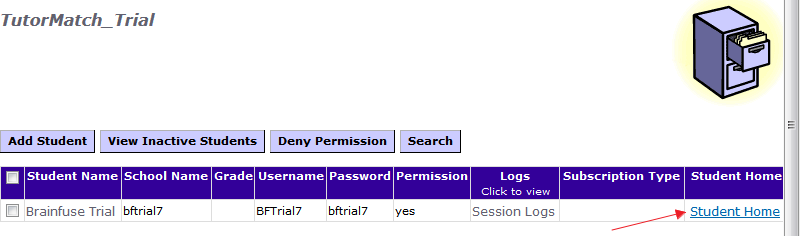
2. Select the "Student Home" link, which will open a popup window with the student's profile.
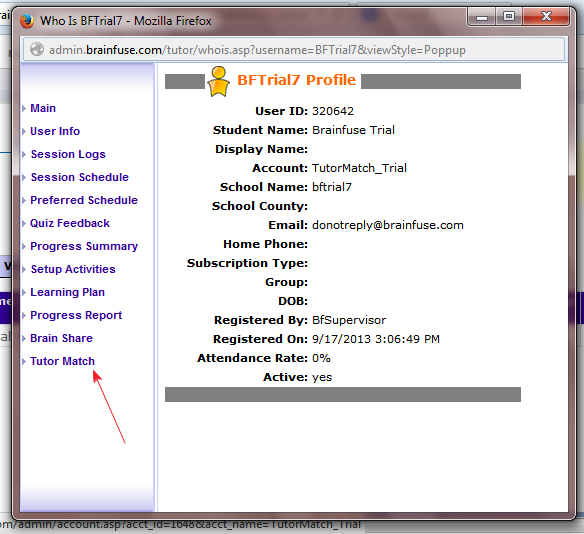
3. At the bottom of the left menu, click "Tutor Match".
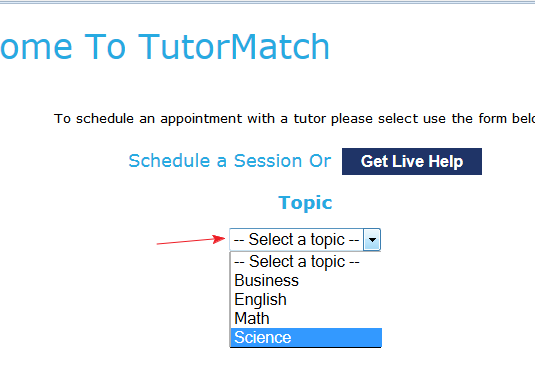
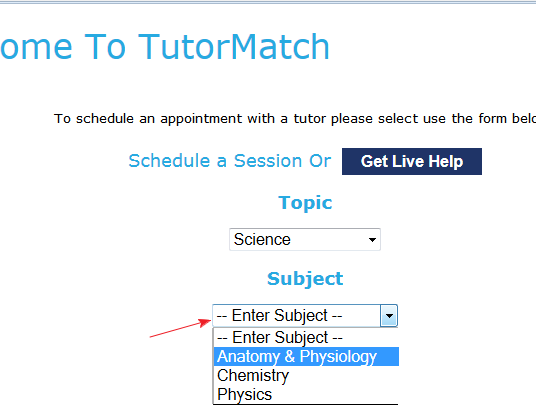
4. From the drop down menu, select the desired topic for the TutorMatch session.
5. From the drop down menu, select the desired subject for the TutorMatch session.
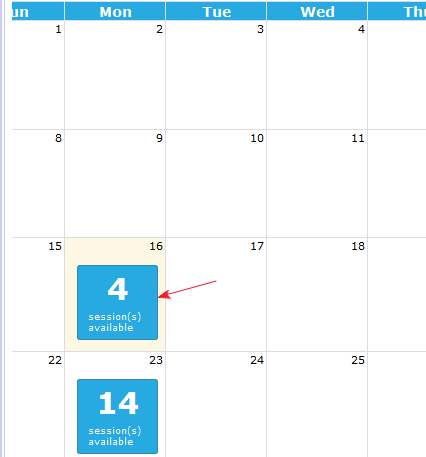
6. From the calendar page, select the desired date of the TutorMatch session.
7. From the menu, select the desired time and tutor for the TutorMatch session.

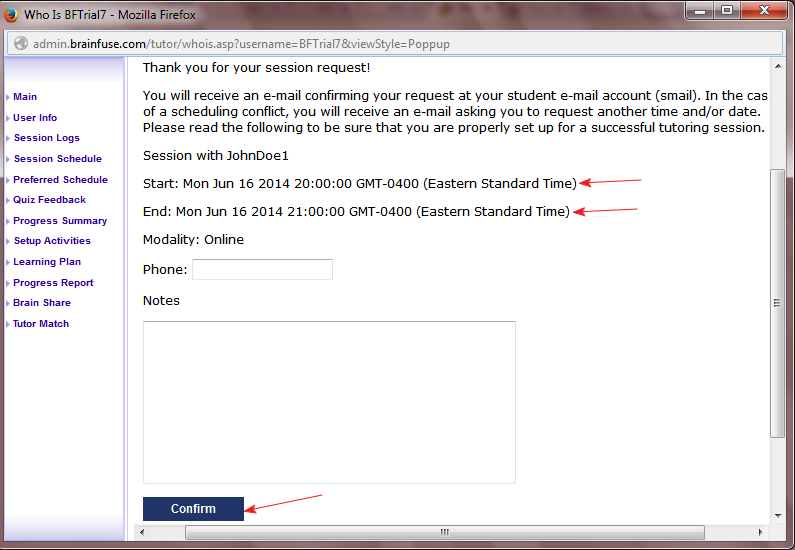
8. On the next page, confirm the Start and End time for the TutorMatch session. If there are no errors, click "Confirm" at the bottom of the page.
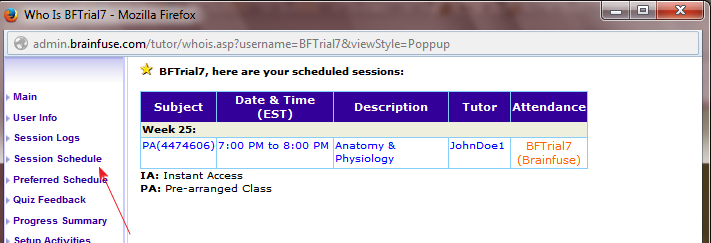
9. The student will receive two confirmation emails: one when the session is scheduled, and another when the session has been confirmed by the tutor. You can click the "Session Schedule" link on the student's profile to confirm that the TutorMatch session has been scheduled.
You can close the Student's Profile window once you have confirmed that the session was scheduled.