Brainfuse Tutor Match Guide: Tutors
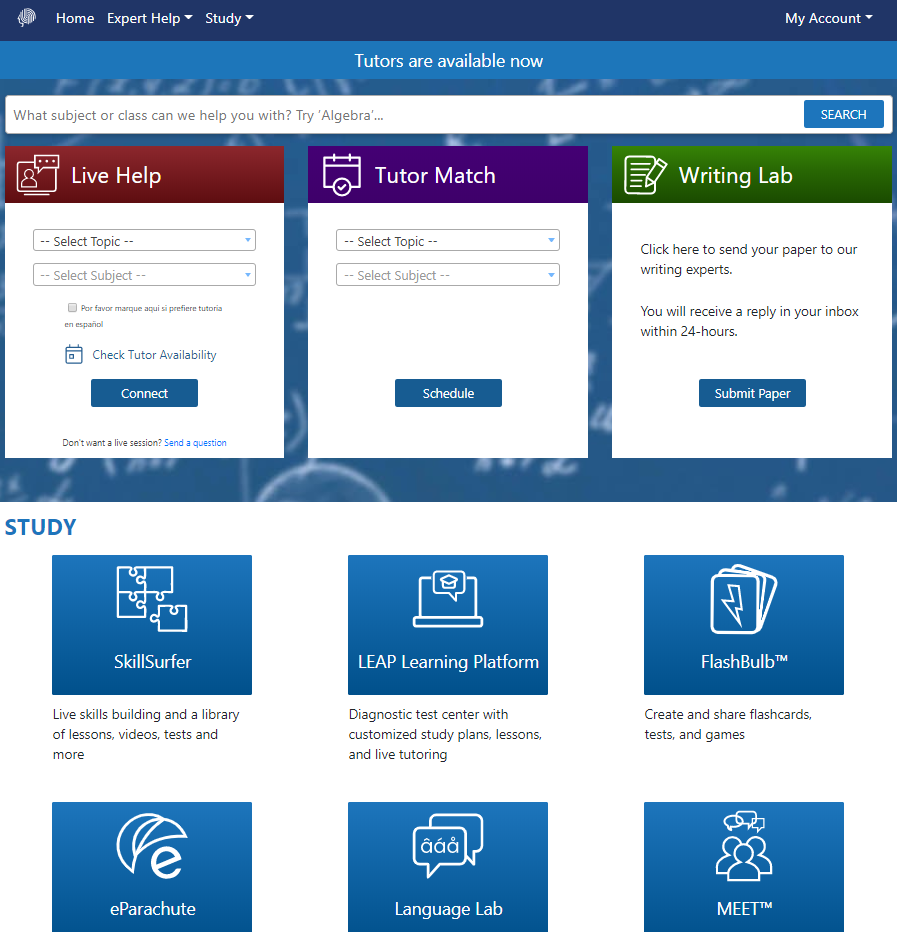
Brainfuse Tutor Match provides students the ability to schedule live tutoring sessions with tutors for assistance in their selected subject. Through Tutor Match, students will connect with tutors using the same Brainfuse Whiteboard used during live tutoring sessions.
This guide will provide steps and details for tutors to self-register and manage their availability for tutoring.
Quick Links: Use the following links to quickly access the area of the guide you need!
Self-Registration: Create your tutor account.
Setting Your Availability: Enter your availability for students to schedule sessions with you.
Editing Your Availability: Update your availability when changes occur to avoid conflicts.
Accepting Student Requests for Tutoring: Confirm pending student requests for a tutoring session.
Scheduling Sessions with Students: Schedule a 1:1 or group tutoring session with specific students.
Tutoring Students: Enter scheduled tutoring sessions to begin working with students.
Brainfuse Whiteboard: Review the Brainfuse Whiteboard and tutor only features for use during a tutoring session.
Cancelling Accepted Sessions: Cancel a previously scheduled session with a student.
Self-Registration: Tutor Match allows those approved to tutor to create their own tutor accounts by following the steps below.
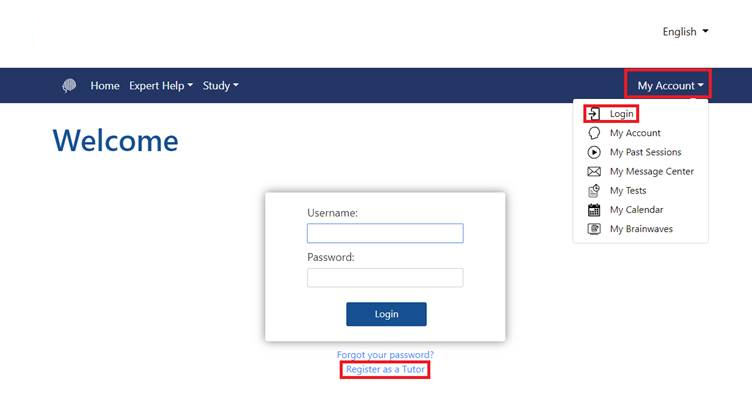
1. To self-register, follow the link provided for your self-registration and select “Register as a Tutor” found under the log in option.
2. Once you select “Register as a Tutor,” you will be able to create your tutor account by entering the requested information. When the required information is entered, select “Next.”

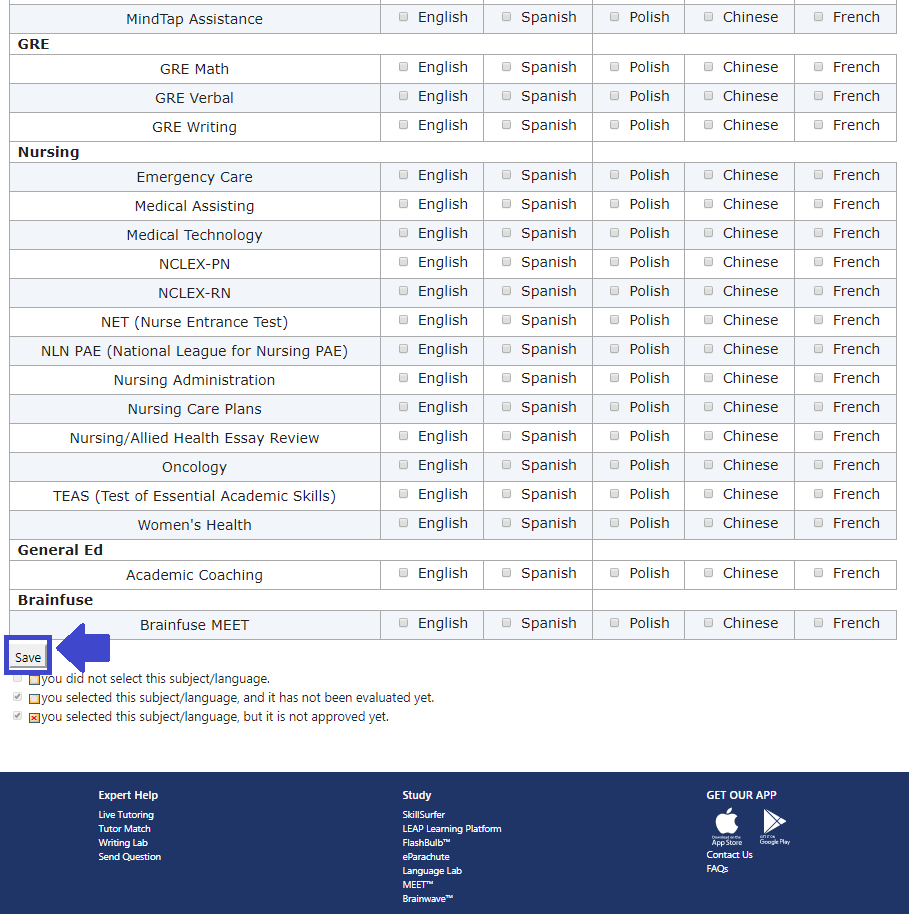
3. After the account details have been entered, you will be able to select the subjects you are able to tutor. When you identify the subject you want to tutor, select the checkbox next to “English” in the subject’s row. You may select as many subjects as you are able to tutor. If you are able to tutor a subject using a different language (e.g. “Spanish”), select the checkbox next to “Spanish” in the subject’s row.
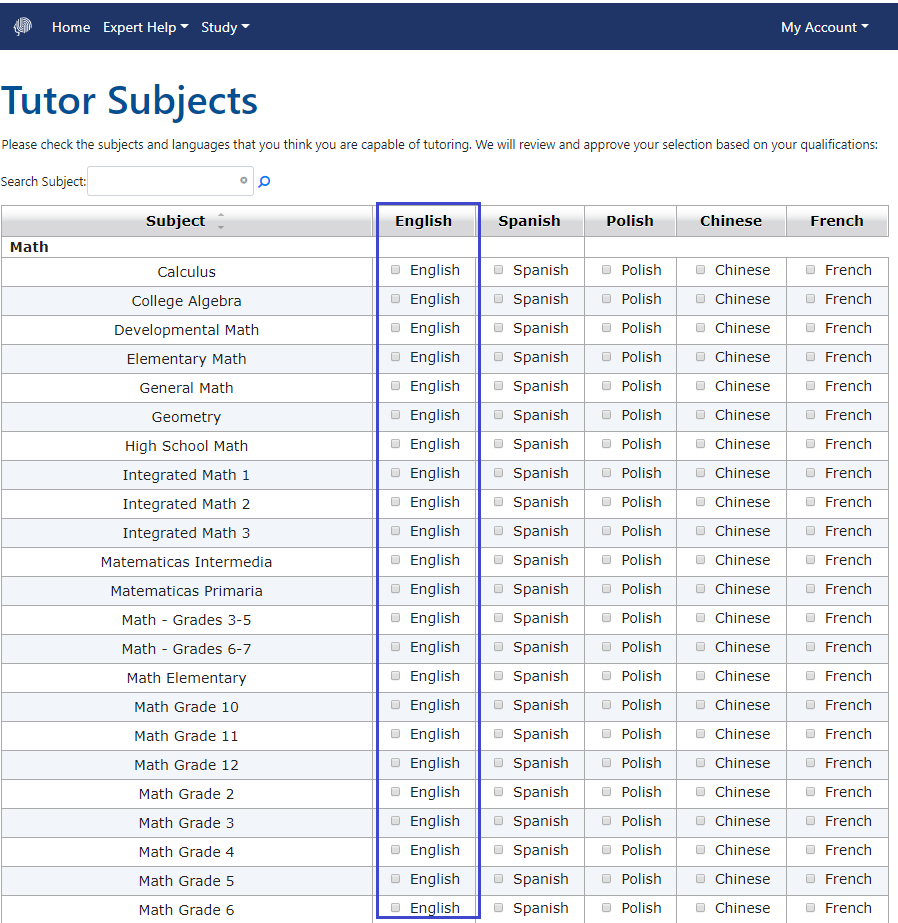
4. When you have selected all the subjects you are able to tutor, select “Save” at the bottom of the page.
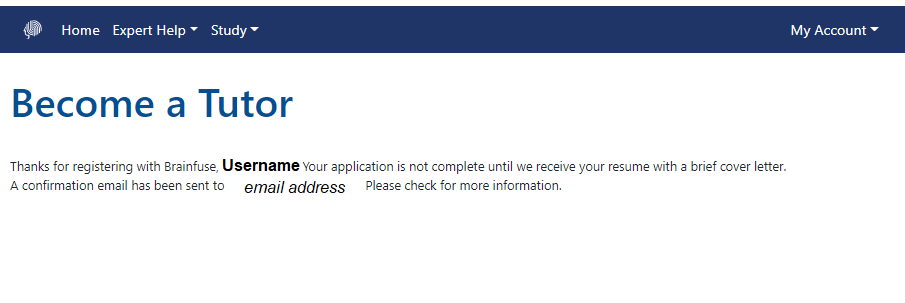
5. After selecting “Save,” your tutor account is created and ready to use!
Setting Your Availability: In order to be available to tutor students, tutors must enter their availability in their tutor account; this will allow students to schedule sessions with the tutor through Tutor Match.
1. To set your availability, log in to Brainfuse using your tutor account credentials (username and password created when Self-Registering above).
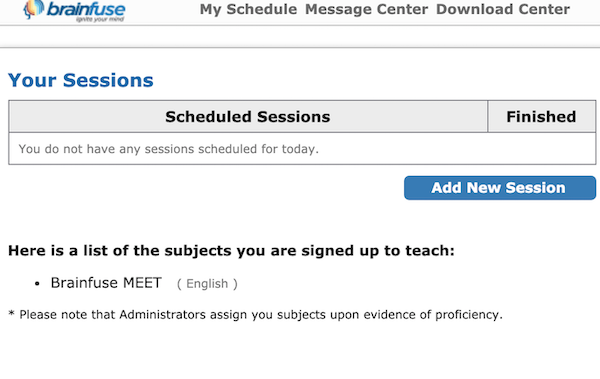
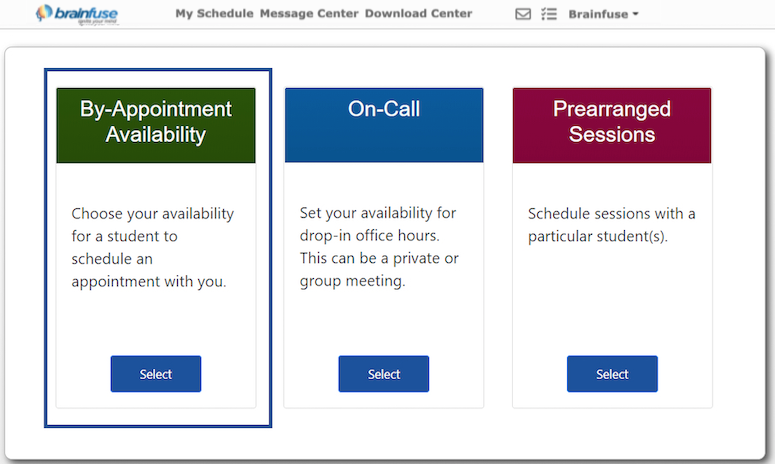
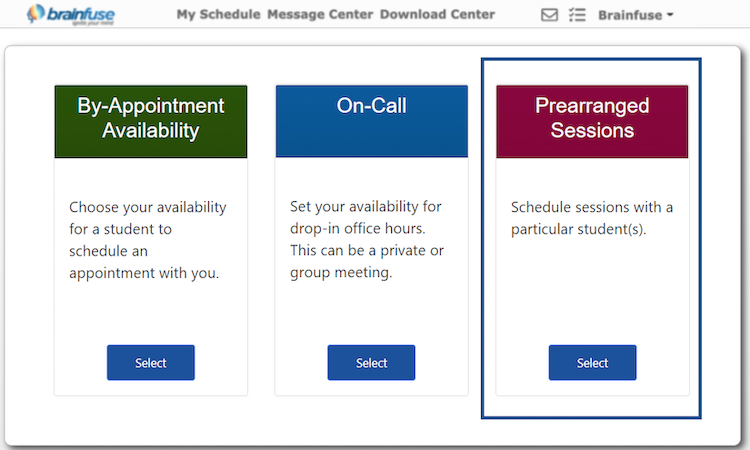
2. From the Brainfuse homepage, select “Add New Session.” You will then see the available session options. To enter your availability for tutoring session, use the “By-Appointment Availability” option.
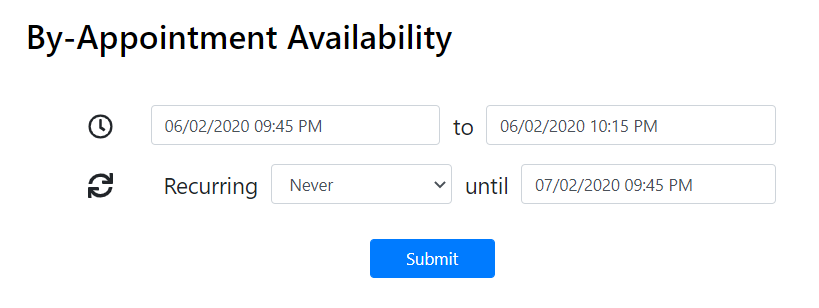
3. From the entry page, select the start date/time and the end date/time for your tutoring availability.
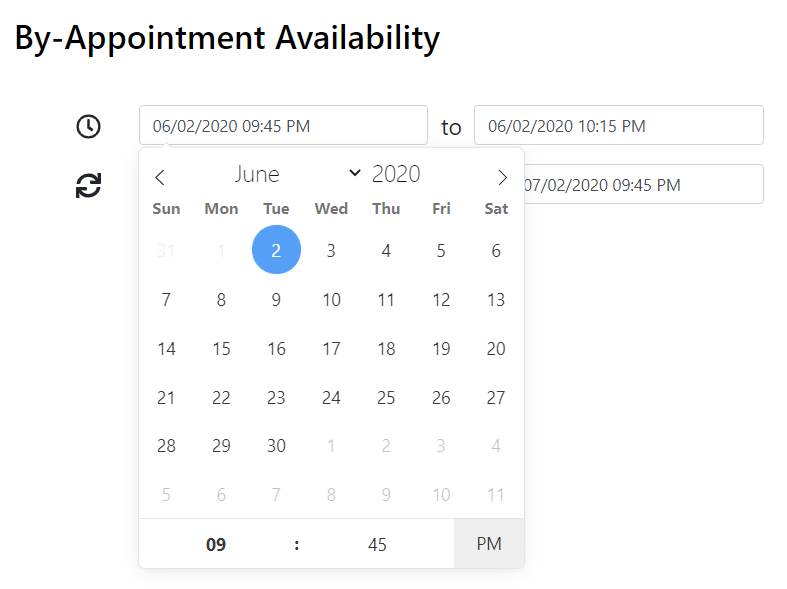
4. Once you have entered your date and time, you may also choose a recurring option. Once the details are entered and complete, select “Submit” to save the available tutoring schedule.
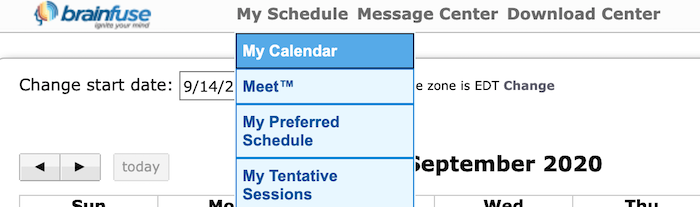
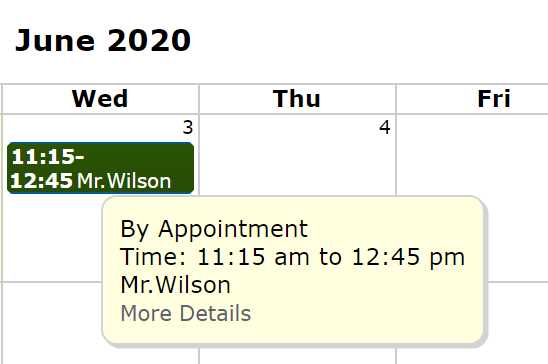
5. After you select “Submit,” your entered availability will be saved. You can view this availability in “My Calendar” as green icons.
Editing Your Availability: Tutor Match allows tutors to change their preferred schedule in the event of a change in availability.
1. To change your preferred schedule, select “My Calendar” from the “My Schedule” option in the top menu bar from your tutor account.
2. Select the availability you wish you edit. Your availability will always be listed as a green “By-Appointment” tile.
3. From the “Edit Schedule” pop-up, you can:
a. Edit: shorten or lengthen the available time for the selected day
b. Cancel: remove the availability from your schedule
c. Copy: copy the entry details to quickly apply the availability to another day.
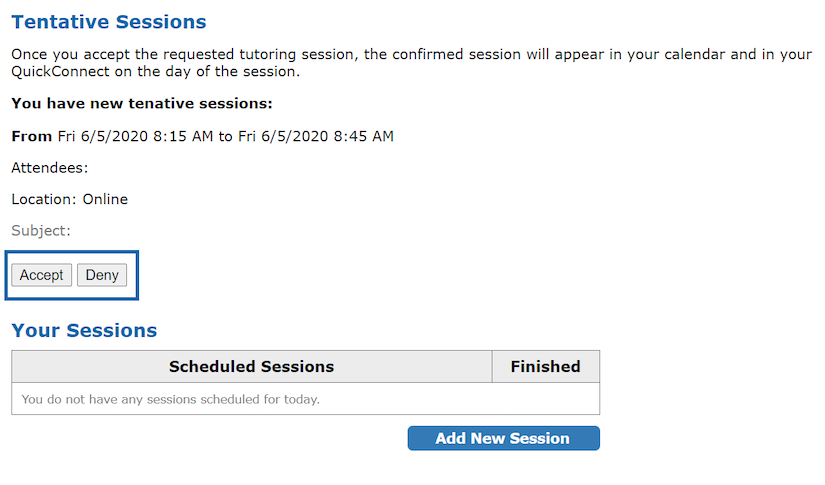
Accepting Student Requests for Tutoring: Tutor Match allows students to request tutoring sessions during the tutors preferred schedule. All requests are tentative and require tutor action to accept (or decline) the requested tutoring session.
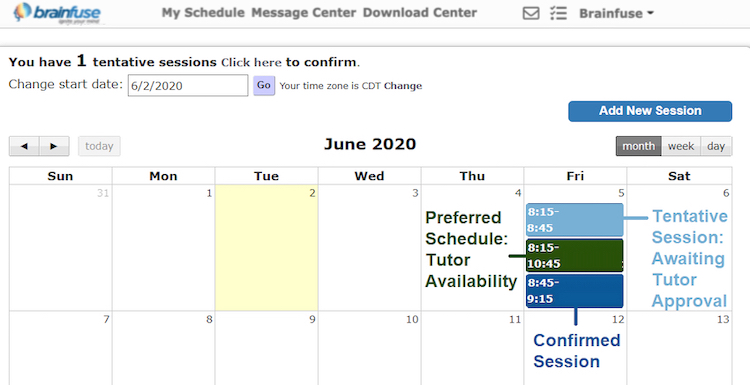
1. When a student attempts to schedule a session with you, you will see a “Tentative Session” listed on your tutor homepage. Review the student’s chosen subject, date, and time and then either “Accept” or “Deny” the session.
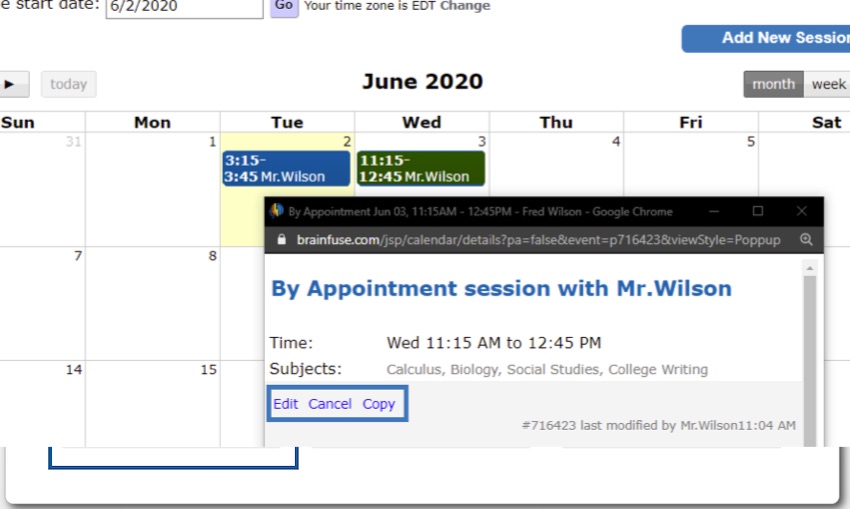
2. Tentative Sessions and Confirmed Sessions will appear in “My Calendar” found under the “My Schedule” menu option. Tentative Sessions will be listed as light blue, while Confirmed Sessions will be dark blue.

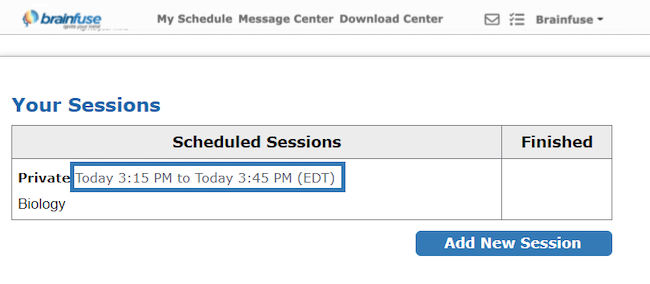
3. Any Confirmed Session will also appear on your tutor homepage on the day of the session.
Scheduling Sessions with Student(s): Tutor Match also allows tutors to schedule sessions with one or more students. These sessions, once scheduled, are automatically confirmed. To schedule sessions with specific students, follow the steps below.
1. To schedule a session with a specific student, select “Add New Session” from your tutor home page.

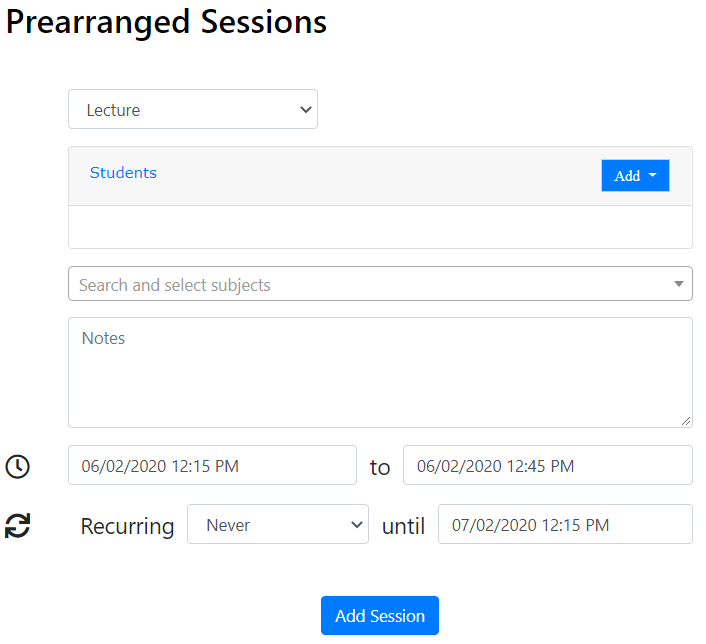
2. In the Prearranged Sessions box, click “Select” to proceed.
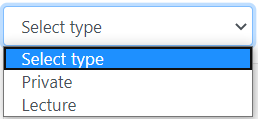
3. In the drop-down, tutors are provided with two types of sessions to schedule with students.
a. Private: this option allows a 1:1 tutoring session to be scheduled between the tutor and a specific student. This only should only be used if only one student will be attending the session.
b. Lecture: this option allows for group tutoring sessions between the tutor and specific students. This option should be used if more than one student will be attending the session.
4. Once the type of session is selected, enter the session details.
a. Student(s): select the specific students by clicking “Add” in the box. This will allow tutors to search for currently enrolled students to add to the session.
b. Subject: enter the subject you intend on assisting the student(s) with during the session.
c. Notes: this field is optional. Session notes (including topics or questions to cover) may be included here for both tutors and students to view prior to and during the session.
d. Date & Time: enter the date and time for the session to begin and end.
e. Recurring: tutors may choose from the recur options to schedule future sessions with the same students at the same time.
f. When the details are finalized, select “Add Session” to schedule the session.
5. Once added, the prearranged session will be automatically approved and added to the calendar for both tutor and student(s). Students and tutors will access these sessions as they do any other scheduled sessions.
Tutoring Students: Tutor Match allows tutors to meet with students using the Brainfuse Whiteboard during a prearranged tutoring session. To begin your scheduled tutoring shift, follow the steps below.
6. Prior to your scheduled tutoring shift with a student, log in to your Brainfuse tutor account. Your tutoring sessions scheduled for that day will appear at the top of homepage for easy access.
7. To begin the scheduled tutoring session, click on the session time noted on the homepage. This will prompt a pop-up window with the Brainfuse Tutor Whiteboard to appear. All online tutoring sessions will use this whiteboard.
The Brainfuse Whiteboard: The Brainfuse Whiteboard provides a variety of tools to communicate during a schedule tutoring session.
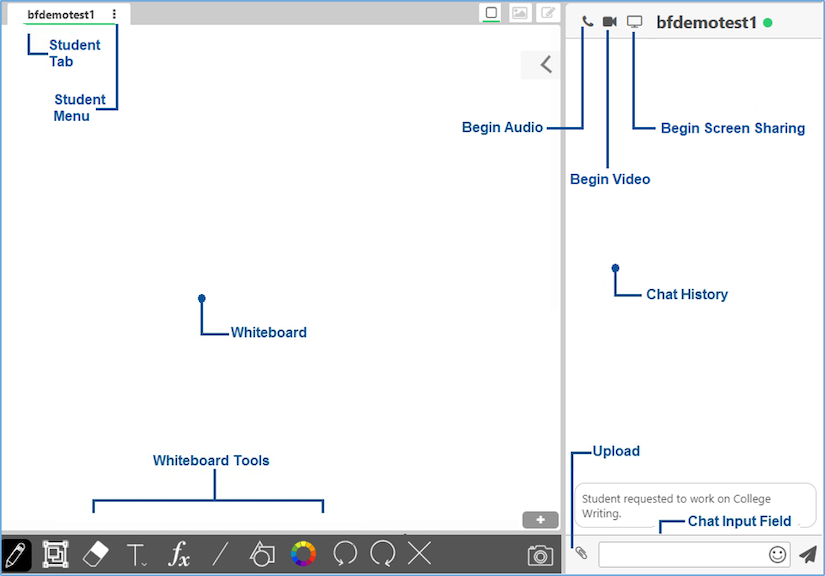
Whiteboard Tools: The following tools are found on both the tutor and student whiteboards. To take a tour of the whiteboard tools, click  on the upper-right corner of the whiteboard.
 PEN: Write/draw with your mouse
 EDIT: Move items on the whiteboard and resize any uploaded images
 ERASER: Erase items from the Whiteboard
 TEXT TOOL: Click on the Whiteboard to start typing. When you select the text tool, it will reveal the following text options:
 SUPERSCRIPT: Changes text into superscript
 SUBSCRIPT: Changes text into subscript
 PASTE: Paste text onto the Whiteboard

 FONT: Change your font style and font size
 MATH SYMBOLS: Enter a mathematical symbol
 SCIENCE SYMBOLS: Enter a scientific symbol
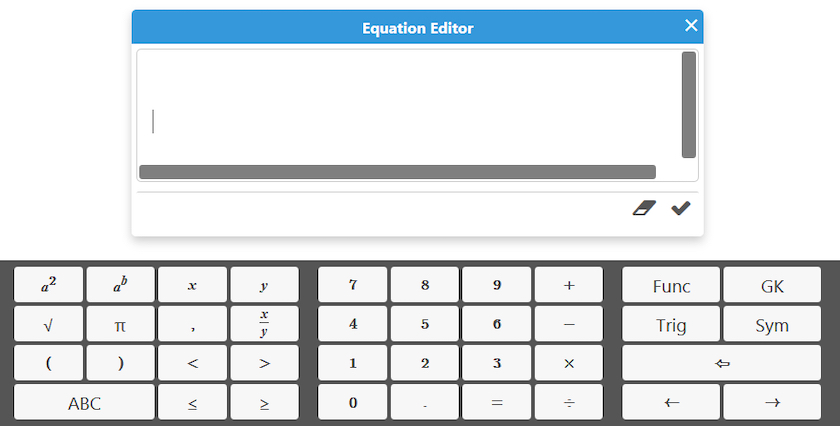
 TYPE EQUATIONS WITH THE EQUATION EDITOR: The equation editor allows you to create mathematical equations, functions, and symbols in the available box. Click on the desired area of the Whiteboard where you want the equation to appear. When you are finished, click
  .
.
 DRAW A STRAIGHT LINE: Draw a straight line on the Whiteboard
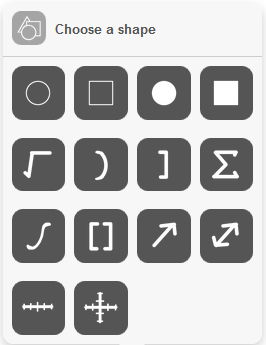
 DRAW SHAPES: Select a shape from the menu to draw it on the Whiteboard
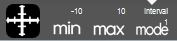 DRAW NUMBER LINES AND GRAPHS: Select MIN, MAX and INTERVAL MODE
to adjust the minimum, maximum and interval values
 COLOR PALETTE: Select from the menu to change pen/text color
 UNDO: Undo the last action
 REDO: Redo the last undo action
 CLEAR: Clears the entire Whiteboard
 SNAP-N-SEND: The Snap-N-Send feature enables you to scan documents, handwritten notes, or any other academic content and send it to the Brainfuse Whiteboard during a tutoring session. To use Snap-N-Send, simply download the Brainfuse Mobile App (iOS or Android versions) and follow the instructions to log into your Brainfuse account. During a tutoring session, select the Snap-n-Send feature from the mobile app, scan the desired material with your mobile device, and it will appear on your whiteboard.
 UPLOAD FILES TO SHARE WITH TUTOR: Click on the Upload button (bottom left of the Chat Box) to upload images, papers, or other assignments to work on them in real time with your student.
 USE AUDIO: Select the Audio button (top left of the Chat Box) to speak with your student through a secure and private conference room, using your computer (VoIP) or a toll-free call
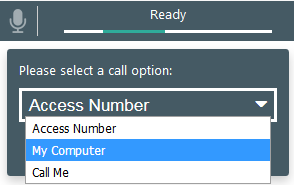
ACCESS NUMBER: Use your phone to dial a toll-free, secure conference number
MY COMPUTER: Use your computer and internet connection (VoIP) to connect to your student
CALL ME: Receive a phone call to connect with your student. Please note that your student will connect with you via our phone bridge. Students will not have access to your phone number.
Tutor Whiteboard Features: The following tools are found only on the tutor whiteboard to help manage the tutoring session
 ADD WHITEBOARD SLIDE: Click on the Add Whiteboard Slide” to add another blank whiteboard to the session. This will also allow you to then toggle between screens instead of scrolling
STUDENT TAB OPTIONS: At the top of the whiteboard, the student tab has a menu (i.e. three dots) that contains the following options for the tutor to use during a scheduled tutoring session:
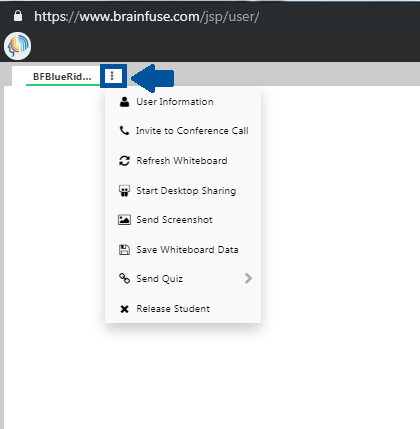
USER INFORMATION: View the student’s username
INVITE TO CONFERENCE CALL: Initiate Audio with the student (same as the audio icon above)
REFRESH WHITEBOARD: Manually update the whiteboard
START DESKTOP SHARING: Begin screen sharing with the student
SEND SCREENSHOT: Send a screenshot of the whiteboard to the student
SAVE WHITEBOARD DATA: Download the whiteboard information to quickly upload in the future
SEND QUIZ: Send previously view quizzes to student
RELEASE STUDENT: Remove student from tutoring session
TUTOR ACCOUNT OPTIONS: The tutor account option allows the tutor to view the following information from the tutor’s account during a tutoring session
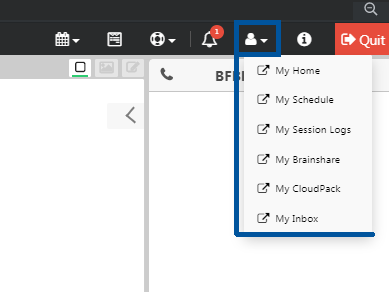
MY HOME: View your tutor account homepage
MY SCHEDULE: View your tutoring schedule
MY SEESSION LOGS: View your previous sessions
MY BRAINSHARE: View files previously sent to students
MY CLOUDPACK: View files save in your CloudPack
MY INBOX: View messages received by students
CURRENT SESSION DETAILS: The following options allow the tutor to view details about the session or send tech details about the session to Brainfuse
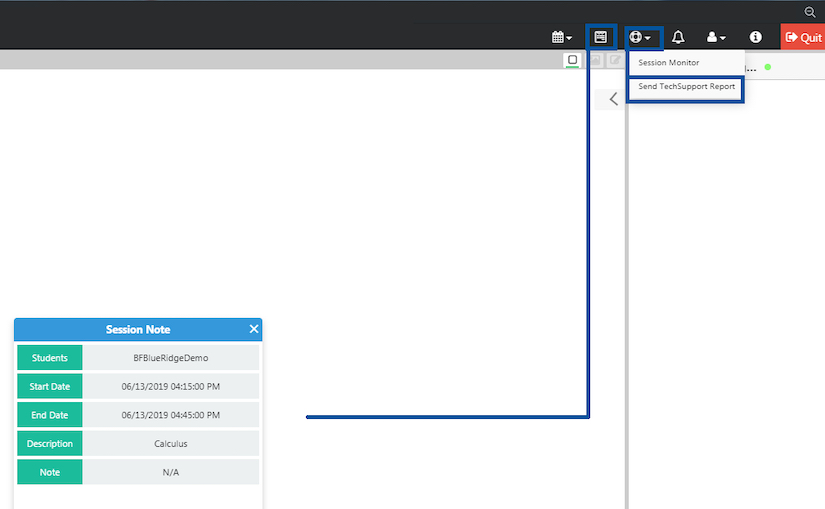
SESSION NOTE: View information provided by the student when the tutoring session was scheduled, including the start/end time, the subject, and any note provided by the student.
SEND TECHSUPPORT REPORT: Automatically send technical details about the session to the Brainfuse Tech Team for any technical issues encountered. Students and tutors may also email [email protected] or contact the Tech Support line for additional assistance.
Cancelling Accepted Sessions: Tutor Match allows tutors to cancel previously accepted tutoring sessions in cases of changed availability. To cancel a session, follow the steps below.
1. Select “My Calendar” from the “My Schedule” menu option to view all of your tutoring sessions and your availability.
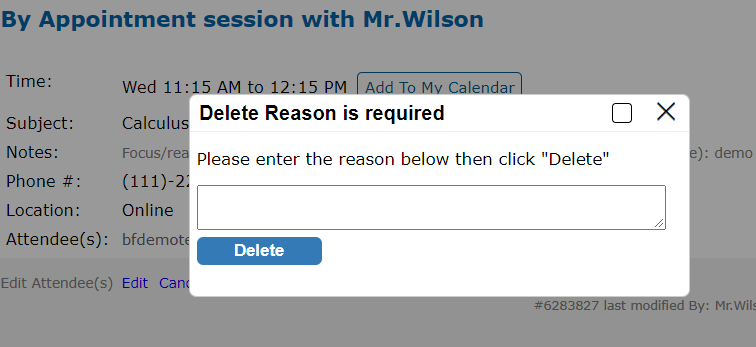
2. Select the session you want to delete. From the new window, select “Cancel” delete window will appear.
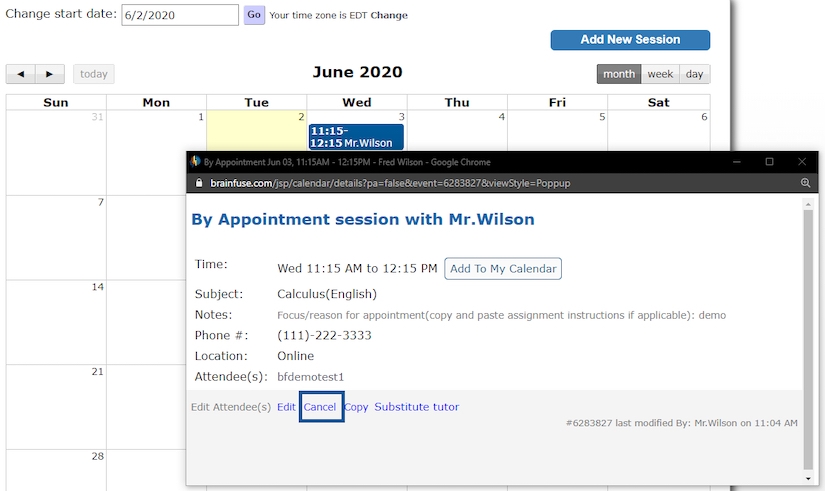
3. If prompted, enter a reason for deletion. When finished, choose “Delete” to remove the session from your scheduled tutoring shifts.