The following is a step-by-step guide for editing a tutor's schedule.
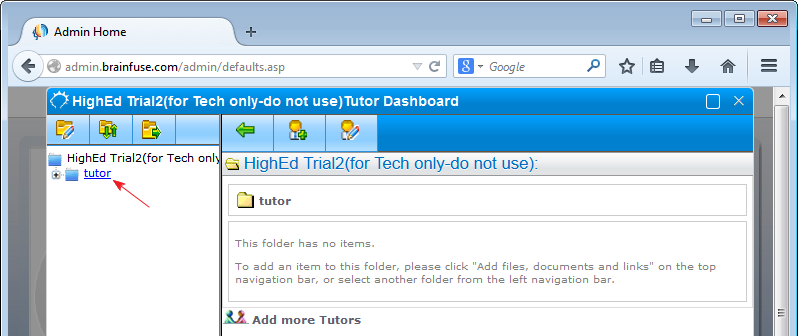
2. From the popup window, select the folder where the tutor accounts are stored.
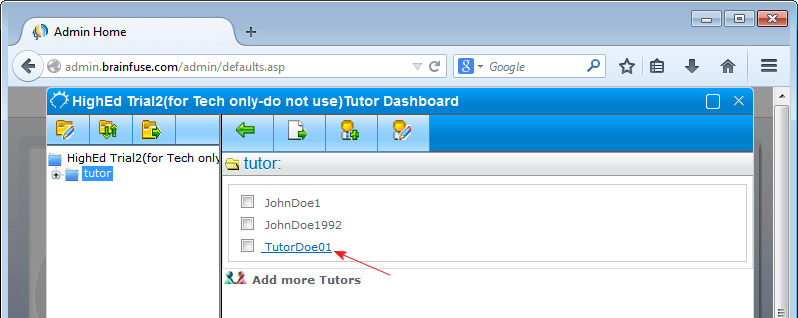
3. Select the tutor profile that you want to edit.
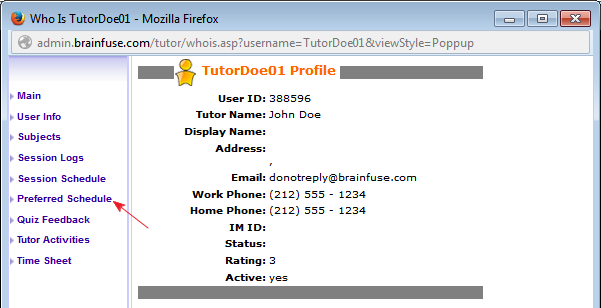
4. A popup will show the selected tutor's profile. From the profile menu, select the "Preferred Schedule" link on the left.
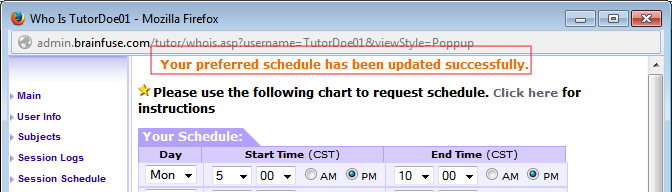
5. Add/Edit the fields for the tutor's schedule. For help, select the "Click Here" link on top of the schedule for instructions on how to fill out the schedule fields.
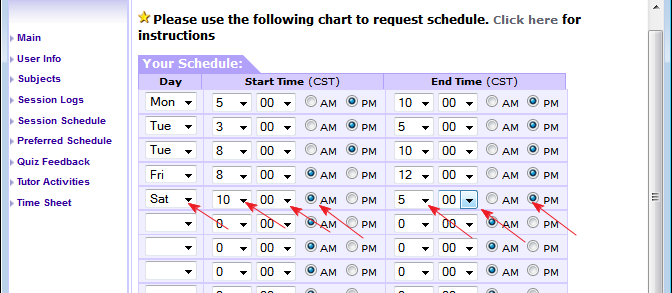
6. Ten slots are provided by default, but if you need more just change the number at the bottom of the schedule.
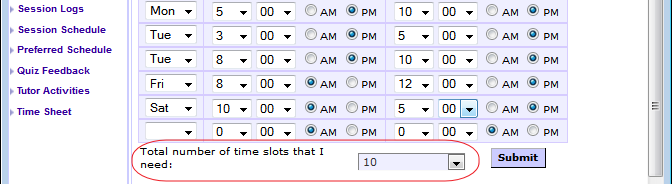
7. Once you made have added or removed the desired changes, click on the "Submit" button at the bottom of the window.

8. If there are no errors you will see "Your preferred schedule has been updated successfully" at the top of the window. Any errors will prompt a popup error indicating the error.